How to let employees book a specific desk
Step 1: Open the Hot Desk app within Slack.
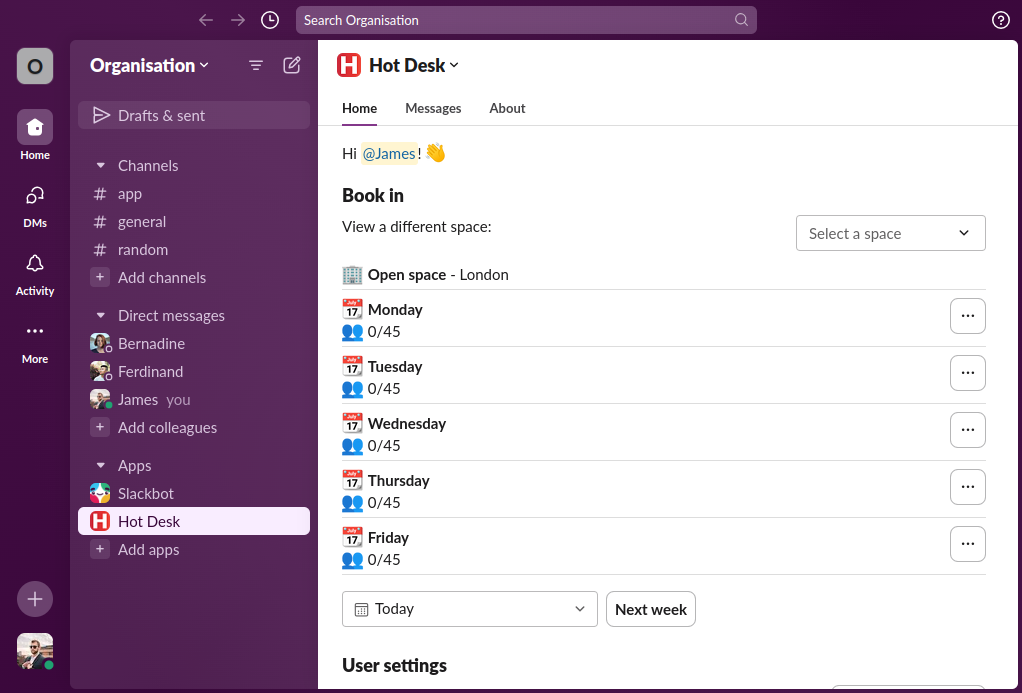
Step 2: Click "Create space".
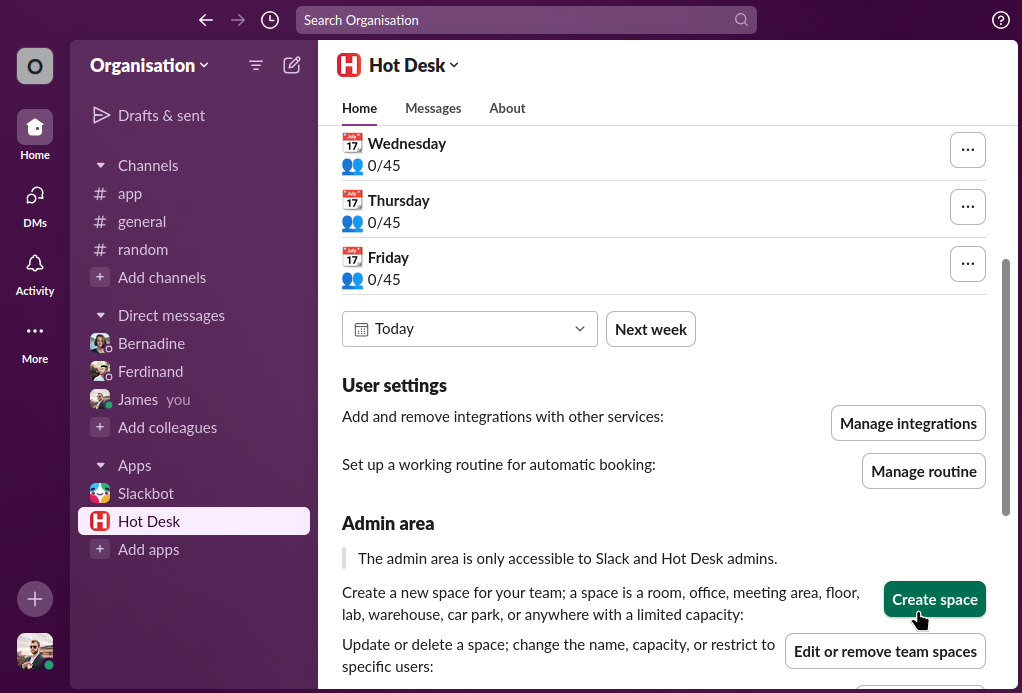
Step 3: Select "Desks" from the dropdown, then select "Yes" to indicate the space will have numbered desks, then click "Next"
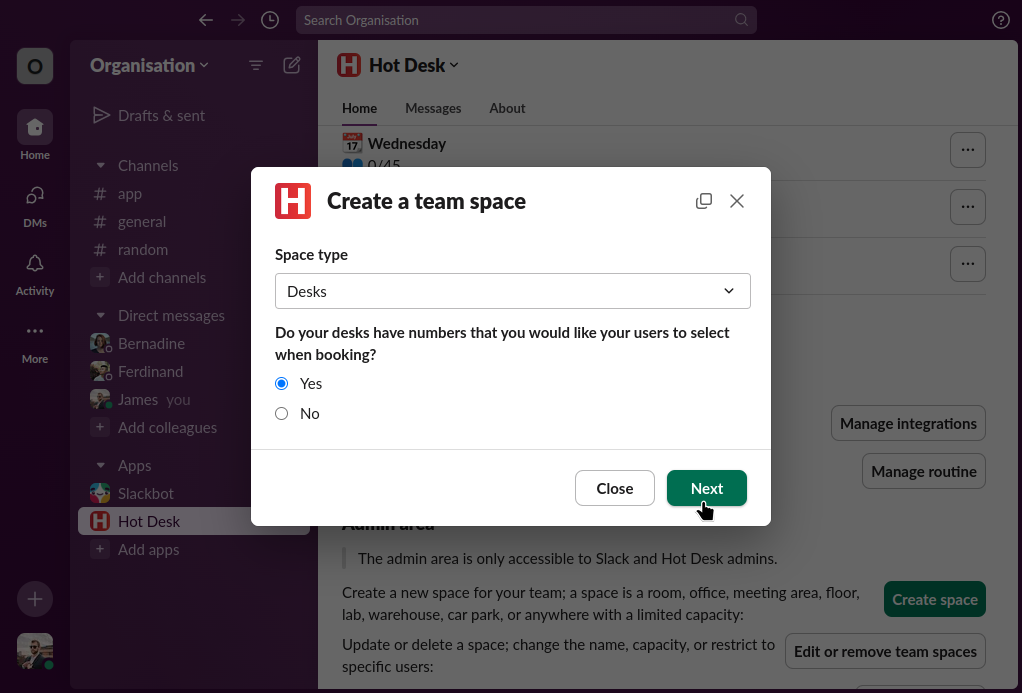
Step 4: Enter the name, location, timezone, and the desk IDs you want your employees to select from.
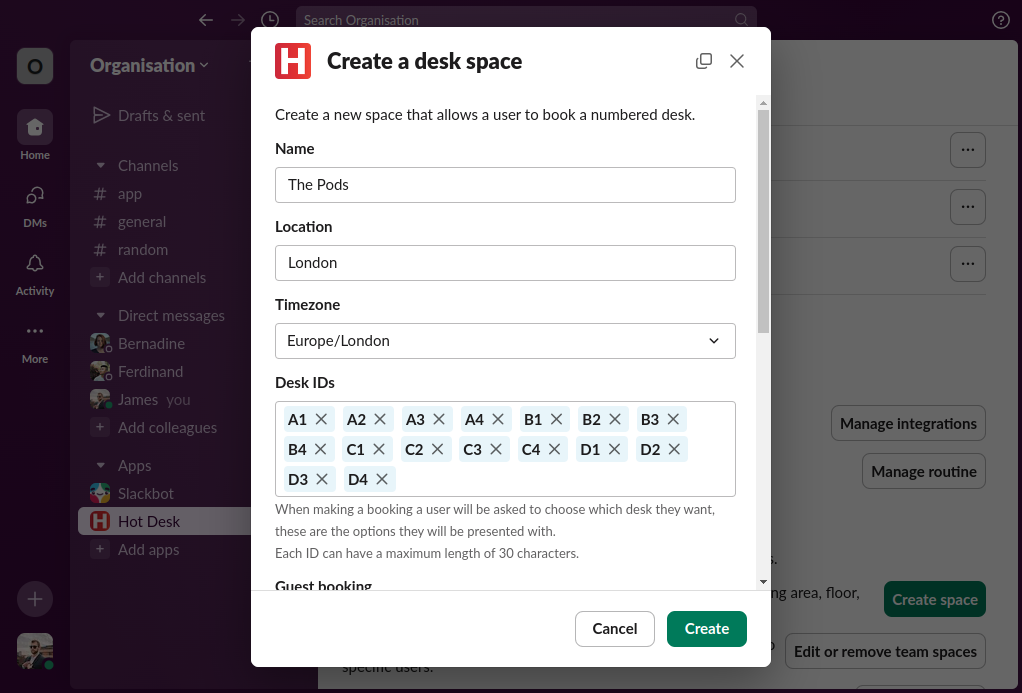
Step 5: Select if you want to allow guests to be booked.
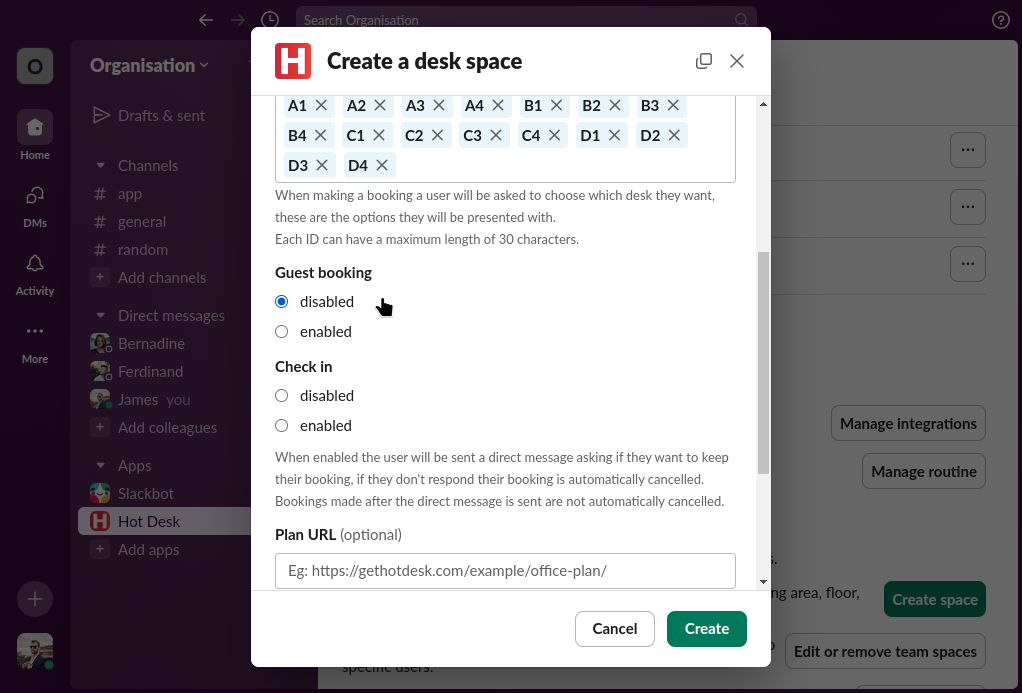
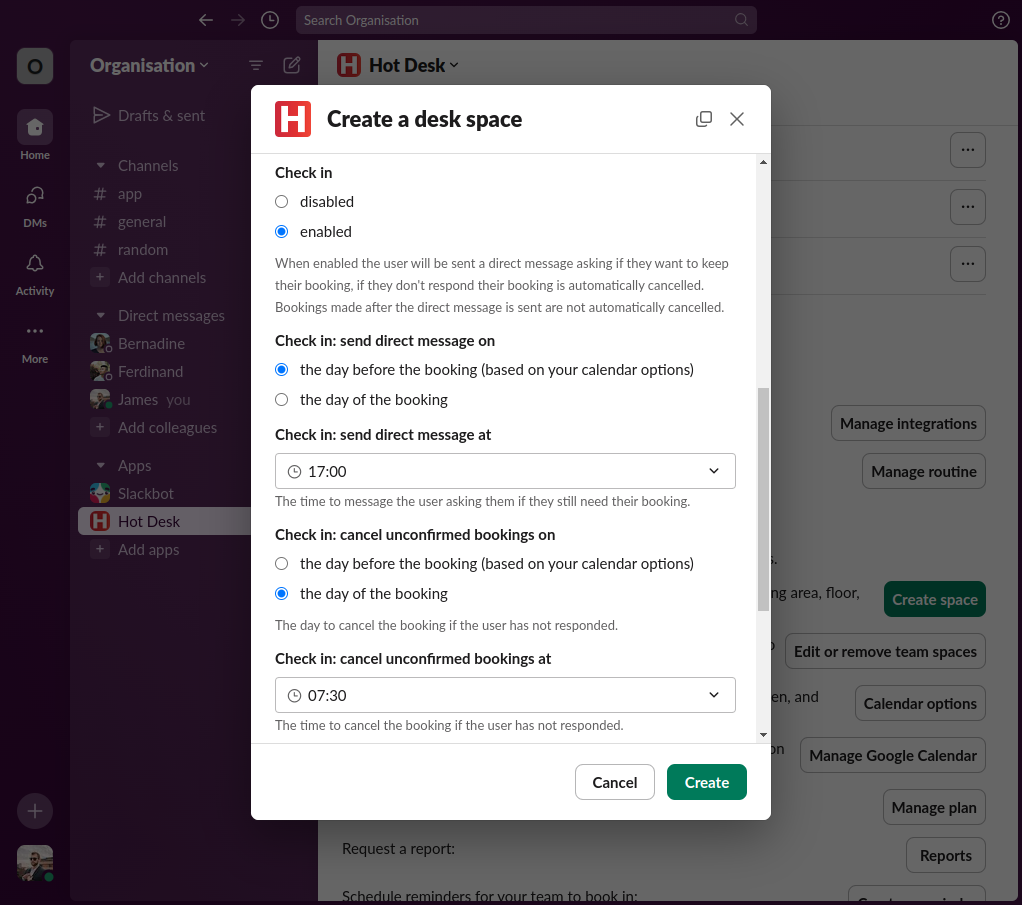
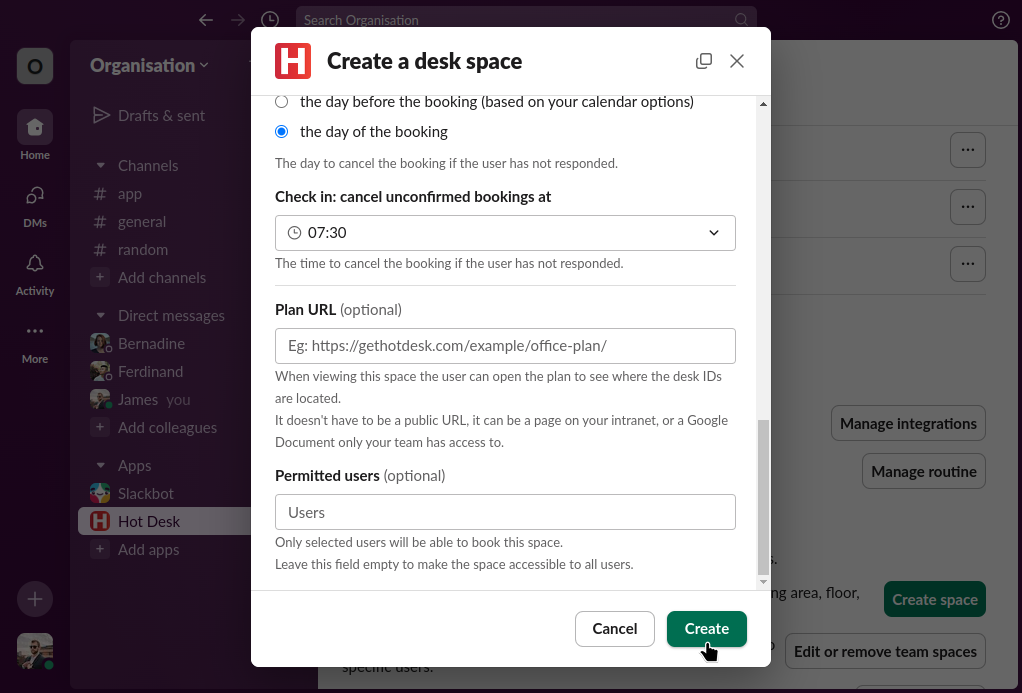
Step 6: Select if you want to ask people to confirm their attendance and automatically cancel bookings that aren't confirmed. The check in feature will send a direct message to each user that is booked in asking them if they want to keep their booking, you can send the direct message on the day of the booking or the day before at any time. You can also set when you want unconfirmed bookings to be cancelled.
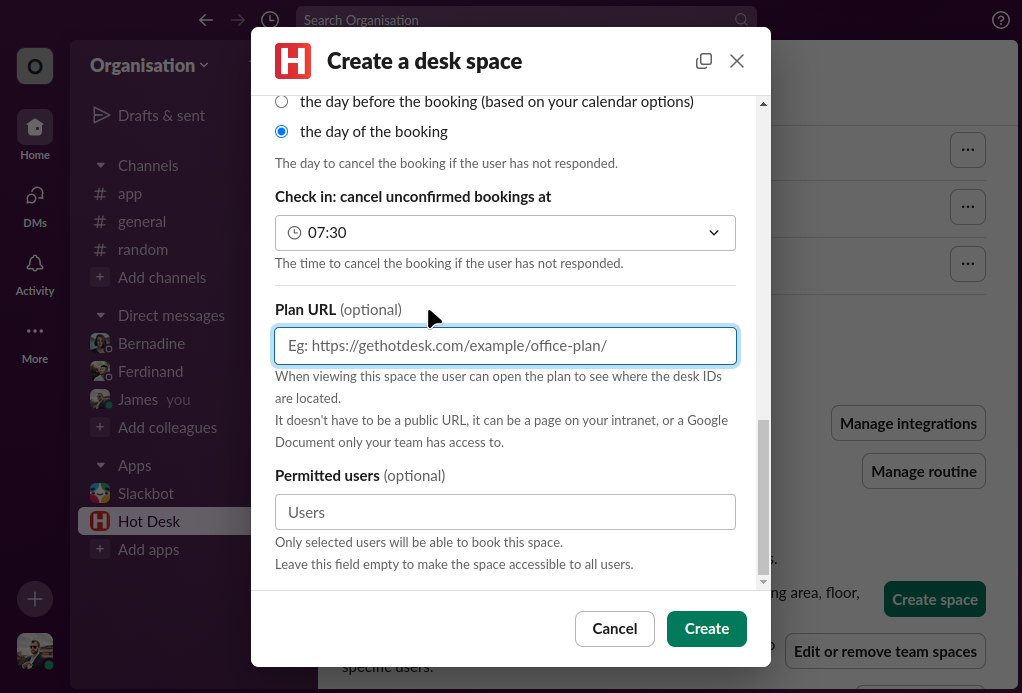
Step 7 (optional): Add a link to the plan of your space. This can be a page on your intranet, or a Google Document only your team has access to.
Step 8 (optional): Enter the names of users you want to be able to use the space. If you want everyone to use the space skip this step.
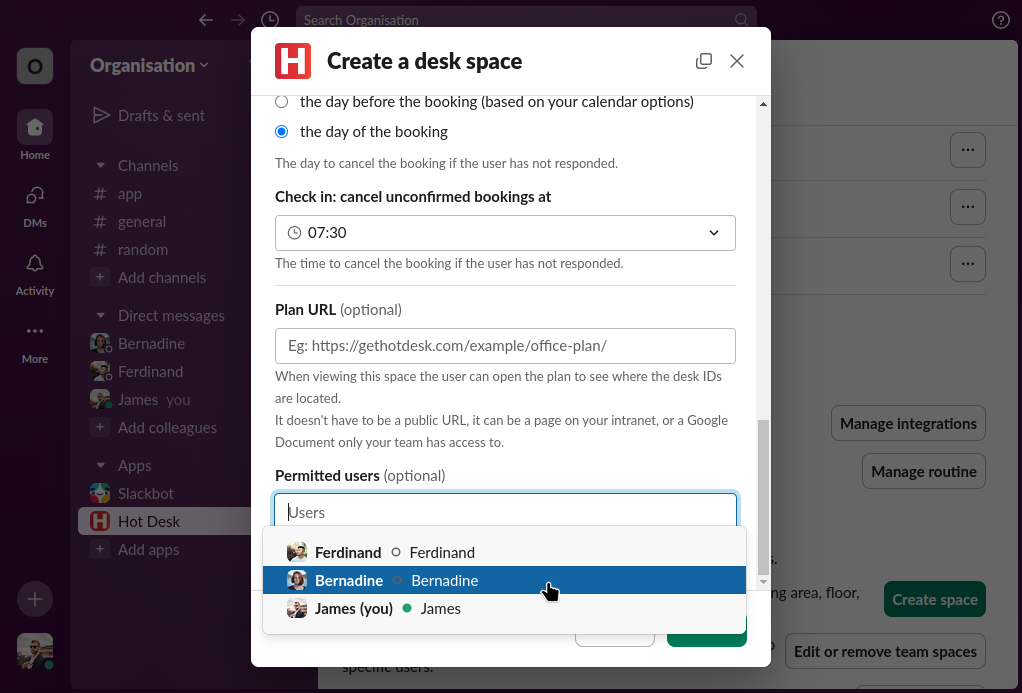
Step 9: Click "Create".
 Hot Desk